Screen recording is one of the iPhone's most practical features – whether for tutorials, gameplay, app demos, or documenting a problem for support. Since iOS 11, the function has been integrated directly into the system and doesn't require an additional app. With iOS 26, Apple simplified the setup in the Control Center and added new settings for screenshots and recordings.
Before iOS 11, screen recording on the iPhone was only possible indirectly – either via QuickTime on a Mac or through third-party apps. Apple has continuously expanded the feature since then, and in iOS 26 it is fully integrated into the Control Center.
The process itself takes only a few seconds: set up the controls, start recording, and you're done. What many don't know is that you can also record audio via the microphone, and iOS 26 offers new settings for the recording format. This article explains everything step by step – from setup and recording with sound to troubleshooting if the function isn't working.
Add Screen Recording to Control Center
Before the first recording can begin, the "Screen Recording" control must be available in the Control Center. In iOS 26, this works directly within the Control Center itself – going through Settings is no longer necessary.
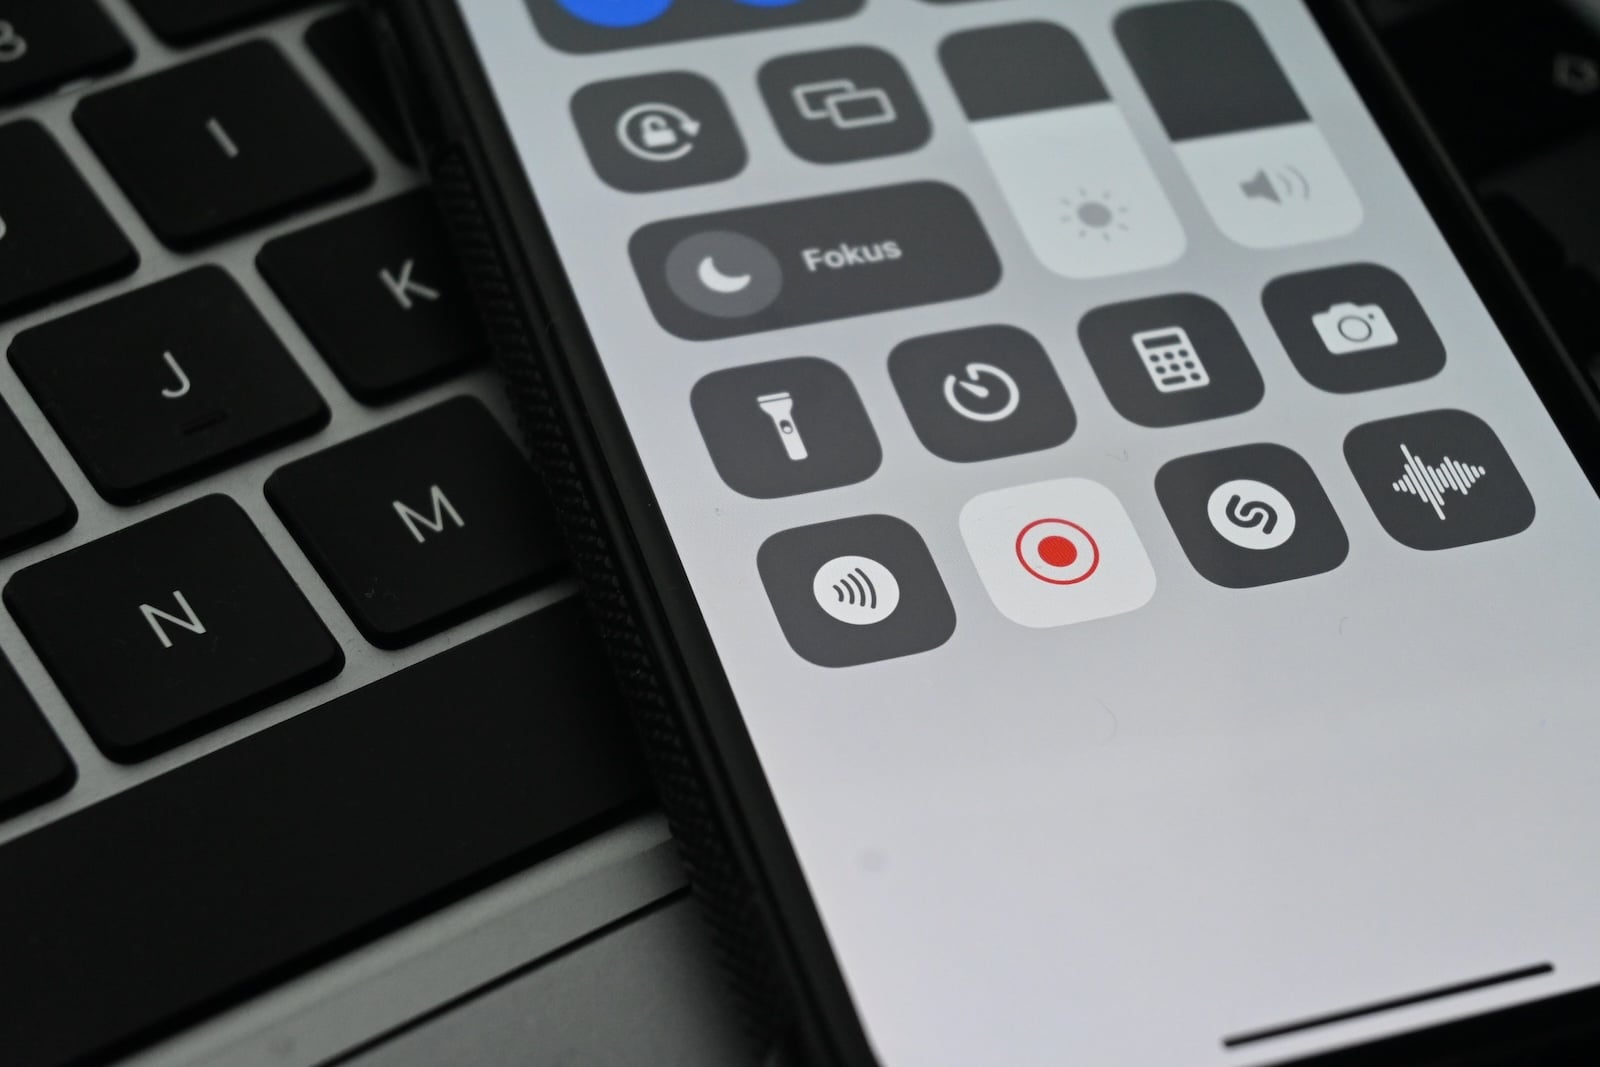
Swipe down from the top right corner of the screen to open Control Center. Place and hold a finger on the background until the controls wiggle. Tap "Add control." In the Controls gallery, tap "Screen Recording." Tap anywhere to return.
The screen recording icon – a filled circle inside a ring – now appears in the Control Center. It only needs to be added once and remains permanently available.
Start and stop Screen Recording
Swipe down from the top right corner of the screen to open Control Center. Tap the record icon. A three-second countdown will begin – then recording will start. Close Control Center and perform the desired action on your iPhone.
During recording, a red status indicator appears in the top left corner of the screen (on iPhones with Dynamic Island, it's a red dot within Dynamic Island). This indicates that recording is in progress.
There are two ways to stop: Tap the red status indicator in the top left corner and select "Stop." Or reopen the Control Center and tap the red recording icon.
After stopping the recording, the image is automatically saved in the Photos app. A brief notification confirms the saving.
Screen Recording with Sound
By default, screen recording only captures system sounds – that is, sounds generated by apps or the system itself. If you also want to record your own voice, for example for a spoken tutorial, you must activate the microphone separately.
Open Control Center. Press and hold the record icon (don't just tap it). The "Microphone" option will appear in the expanded menu. Tap the microphone icon to activate it – it will change from gray to red. Tap "Start Recording".
The microphone remains activated until it is manually deactivated. The setting will therefore still be active during the next recording. Anyone recording confidential information should consciously switch off the microphone.
Find and edit Screenshots
All screen recordings are saved in the Photos app. They can be filtered there under "Collections" > "Media types" > "Screen recordings".
You can trim recordings directly in the Photos app: Open the video, tap "Edit," and adjust the start and end points using the yellow handles. This allows you to neatly cut off the countdown at the beginning and the opening of the Control Center at the end.
For more advanced editing – such as merging multiple clips or adding text – iMovie is a good option, which is available for free in the App Store.
New Settings in iOS 26
With iOS 26, Apple introduced new options under Settings > General > Screenshot that affect both screenshots and screen recordings.
Fullscreen Preview
By default, iOS 26 displays a full-screen preview with AI-powered editing options (Visual Intelligence) after a screenshot is taken. Users who prefer the classic thumbnail view in the bottom left corner can disable the "Full-screen previews" option. We have a detailed article on this topic: iOS 26 Screenshots: Change the preview settings and work faster.
HDR format
In iOS 26, screenshots can be saved in either HDR or SDR format. HDR screenshots use the HEIF format and preserve the full dynamic range of HDR content. SDR screenshots are saved as PNGs, as usual. This setting can be found under "Format" in the same menu.
CarPlay screenshots
Previously, when CarPlay was connected, two screenshots were automatically taken – one from the iPhone and one from the CarPlay display. With iOS 26, only the iPhone screenshot is saved by default. The CarPlay screenshot can be enabled separately if needed.
Screen Recording not working – Troubleshooting
In some cases, screen recording cannot be started or stops unexpectedly. There are several possible reasons for this.
The symbol is missing in the control center
Screen recording must be manually added to the Control Center (see above). Recording cannot be started without this control.
Screen Time blocks the function
Screen recording may be disabled under Settings > Screen Time > Restrictions > Content Restrictions. This restriction is often set on devices configured by parents for children. Set this to "Allow" to enable the feature.
Certain Apps block recording
Streaming apps like Netflix, Disney+, Amazon Prime Video, and Apple TV block screen recording for copyright reasons. During recording in these apps, the iPhone displays a black screen. This cannot be changed – this restriction is imposed by the app developers.
Screen mirroring is active
Screen recording and screen mirroring cannot be used simultaneously. If the iPhone is currently mirroring its screen to an Apple TV or another display, the mirroring must be stopped first.
Restart iPhone
If recording doesn't work despite correct settings, a restart might help. A forced restart – briefly press the Volume Up button, briefly press the Volume Down button, and hold the Side button until the Apple logo appears – often resolves temporary software issues. Our article Resetting your iPhone: All reset methods under iOS 26 explains other reset methods.
Tips for better screen recordings
Before recording, activate "Do Not Disturb" mode or focus mode. This will suppress incoming messages, calls, and notifications during recording, preventing them from appearing in the video.
For longer recordings, connect your iPhone to the charger. Screen recordings consume battery power and generate heat, especially with high-resolution content.
Check your available storage space: A one-minute screen recording requires approximately 30 to 50 MB, depending on the content. For longer recordings, storage can quickly become scarce. You can check your current storage level under Settings > General > iPhone Storage. If you regularly struggle with low storage, you can find tips in our article Clearing the iPhone Cache.
Apple doesn't set a time limit for screen recordings. The maximum length depends solely on available storage space. The best products for you: Our Amazon storefront offers a wide selection of accessories, including those for HomeKit. (Image: Shutterstock / Camilo Concha)
- How to view your Wi-Fi Password on your iPhone: All Methods under iOS 26
- iPhone Update Problems: All Solutions for iOS 26
- Creating an iPhone Backup: All methods under iOS 26
- Transferring Data to a new iPhone: All Methods under iOS 26
- Clear History on iPhone: Safari, Chrome and more
- Disable Audio Zoom on iPhone
- iPhone Battery drains quickly: Here's how to extend Battery Life under iOS 26
- Resetting your iPhone: All reset methods under iOS 26
- iCloud Costs: All storage plans, prices, and which one is worth it
- Recording an iPhone call: What works in Germany – and what doesn't
- Clear iPad Cache: More Storage and better Performance
- Clear iPhone cache: How to make your iPhone fast again
- Search iCloud.com: Activate new search function in iOS 26.4
- Apple Watch Tips: Hidden features you didn't know about
- iPhone storage full? Here's how to instantly free up more space
- Apple Account Purchase History: Review purchases, subscriptions & costs
- Apple Music: How to successfully migrate from Spotify & Co.
- AirTag 2 Factory Reset: How to Perform a Reset
- Apple Games App: Central hub for modern gaming
- Lockdown Mode: Maximum security for iPhone, iPad and Mac
- Apple Music: How to activate translated song lyrics in iOS 26
- Apple Creator Studio: Apps, subscription, and clear AI limits
- Is Apple Music taking up too much storage space? This will help immediately
- AirTag 2: Setting up Precision Finding on the Apple Watch
Frequently Asked Questions: Recording iPhone Screen
Open Control Center, tap the record icon, and wait for the three-second countdown. To stop, tap the red status indicator in the top left corner and select "Stop." The video will be automatically saved to the Photos app.
In the Control Center, press and hold the record icon. In the expanded menu, tap the microphone icon to activate it. Then tap "Start Recording." The microphone will then record your voice.
Common causes: The control is missing in the Control Center, Screen Time restrictions are blocking the function, a streaming app is preventing recording, or screen mirroring is active. Restarting the iPhone often resolves temporary issues.
No. Streaming apps block screen recording for copyright reasons. The iPhone will only display a black screen while recording in these apps.
In the Photos app, go to "Collections" > "Media types" > "Screenshots". There you can filter and edit all screenshots.
No. Apple does not impose a software time limit. The maximum recording time depends solely on the available storage space on the iPhone. One minute of recording requires approximately 30 to 50 MB.
Open the video in the Photos app and tap "Edit". Use the yellow handles at the beginning and end to trim the desired sections and tap "Done".