New iPhone unboxed, old one lying next to it – now what? Photos, messages, apps, passwords, and settings need to be transferred to the new device. Apple offers several ways to do this: Quick Start, iCloud backup, or transfer via computer. This article explains all methods step by step, highlights the differences, and helps with common problems.
Upgrading to a new iPhone used to be a frustrating experience. Since Apple introduced the Quick Start feature, the process has become significantly easier – simply place both iPhones side by side, wait a moment, and you're done. However, pitfalls still exist: insufficient iCloud storage, forgotten Apple account passwords, or apps that get stuck in a waiting state. Preparing beforehand saves time and prevents data loss.
Before the move: Checklist
Regardless of which method is chosen, a few things should be done beforehand:
Update iOS – Install the latest iOS version on both iPhones. Check for software updates under Settings > General > Software Update. Different iOS versions can cause transmission errors.
Have your Apple account and password ready – You will be asked for your Apple ID or Apple account during setup. If you don't have your password handy, you should reset it beforehand.
Create a backup – Even though Quick Start transfers the data directly, a current backup in iCloud or on your computer is mandatory – as a safety net in case something goes wrong.
Check the battery – Both devices should be at least 50 percent charged or connected to the charging cable. An interrupted connection can lead to data loss.
Unpair your Apple Watch – If an Apple Watch is paired with your old iPhone, unpair it beforehand using the Watch app. This will automatically create a backup of your watch, which can be restored on your new iPhone.
Activate Wi-Fi and Bluetooth – Wi-Fi and Bluetooth must be switched on on the old iPhone.
Method 1: Quick Start – directly from iPhone to iPhone
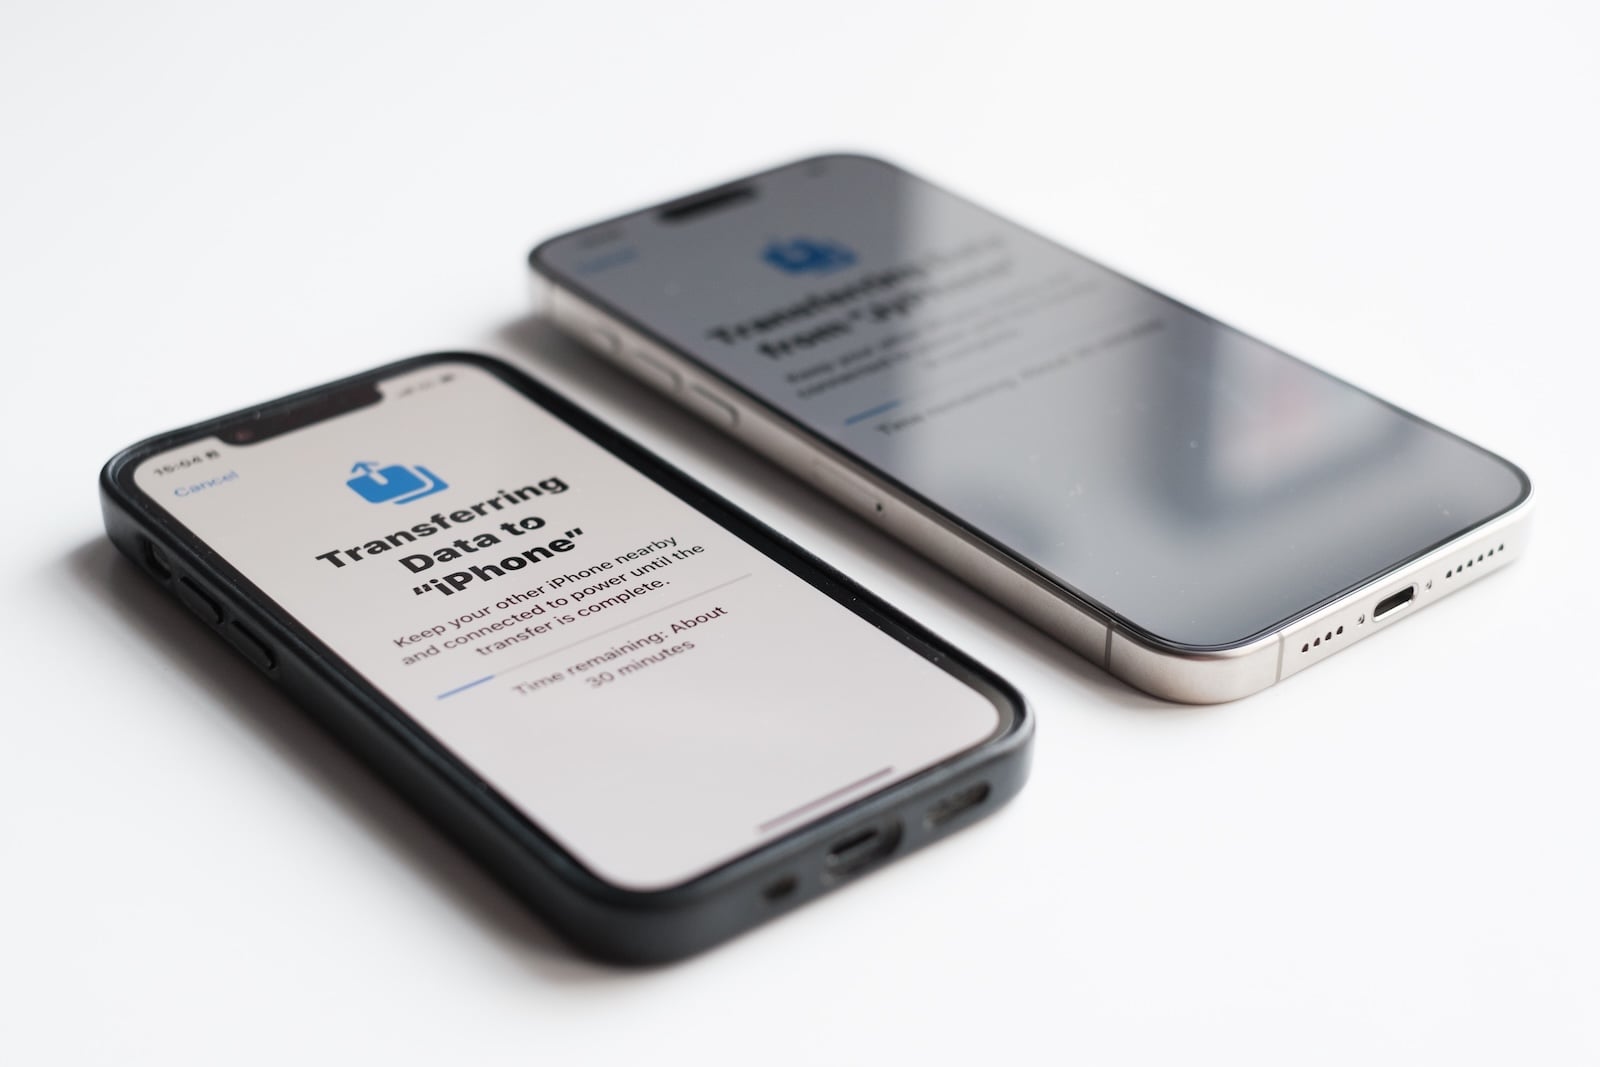
Quick Start is the simplest and most popular method. Both iPhones are placed next to each other and the data is transferred wirelessly. The older iPhone must be running at least iOS 12.4 for this to work.
Here's how it works:
- Turn on the new iPhone – the "Hello" welcome screen appears.
- Place the old iPhone next to it – the quick start prompt will automatically appear on the old device.
- Tap Continue on the old iPhone
- Scan the animation on the new iPhone using the camera of the old iPhone.
- Enter the code from the old iPhone on the new device
- Setting up Face ID or Touch ID on the new iPhone
- On the "Transfer Data" screen, select: Transfer from iPhone (directly) or Download from iCloud (via iCloud)
With "Transfer from iPhone," the data is transferred directly between the devices. Both iPhones are unusable during the transfer. With "Download from iCloud," the backup is downloaded from iCloud—the new iPhone is ready to use faster because apps are downloaded in the background.
Quick start transfer tips:
- Connect both devices to the power supply
- Data transfers of 64 GB and more can take from 30 minutes to over an hour.
- Do not disconnect or move the devices until the transfer is complete.
- If the quick start prompt does not appear: restart both devices.
Method 2: Restore from iCloud backup
This method is particularly suitable if the old iPhone is no longer available – for example, due to loss, damage, or if it has already been sold. The data is loaded onto the new iPhone from a previously created iCloud backup.
Create a backup on the old iPhone:
- Settings > Apple ID > iCloud > Open iCloud Backup
- Tap Create backup now and wait until it is complete.
Since iOS 15, Apple has offered free iCloud storage for 21 days when transferring data to a new iPhone. To do this, go to Settings > General > Transfer or Reset iPhone, tap "Prepare for New iPhone," and select "Move All Data with iCloud."
Restore on the new iPhone:
- Turn on the new iPhone and go through the setup assistant.
- Under Apps & Data, select the option Restore from iCloud Backup.
- Sign in with your Apple account and select the desired backup.
- Wait until the restore is complete – apps will be reloaded in the background.
Method 3: Via computer (Finder or Apple Device App)
Those who don't want to use iCloud backup or have very large amounts of data can perform the transfer via their computer. This method is independent of internet speed and is often faster for large backups.
Create a backup on your computer:
- Connect the old iPhone to your Mac or PC using a USB cable
- Open Finder on a Mac, or the Apple Devices app (or iTunes on older systems) on a PC.
- Select your iPhone and click on Back Up Now
- Important: Enable the Encrypt local backup option – this is the only way to ensure that passwords, health data, and Wi-Fi settings are also backed up.
Restore on the new iPhone:
- Connect the new iPhone to the computer using a USB cable.
- In Finder or the Apple Devices app, click Restore Backup
- Select the desired backup and enter the encryption password.
- Wait until the recovery is complete.
Method 4: Wired transfer between two iPhones
Since iOS 17, data can also be transferred directly from iPhone to iPhone via cable – without Wi-Fi. This is useful with unstable Wi-Fi or very large amounts of data.
Requirements: A USB-C cable (for two USB-C iPhones) or a USB-C to Lightning cable (when transferring from an older iPhone to a newer model). Both iPhones are connected directly, and the transfer takes place via the cable.
The process is identical to the quick start – only instead of wireless transmission, a cable is used.
Which method when?
| Method | Requirement | Length of time | Ideal for |
|---|---|---|---|
| Quick Start (wireless) | Old iPhone available, Wi-Fi | 20–60+ min. | Standard transfer |
| Quick Start (Cable) | USB-C cable, old iPhone available | 20–60+ min. | Unstable Wi-Fi, large data volumes |
| iCloud Backup | iCloud backup available | Variable (Wi-Fi dependent) | Old iPhone no longer available |
| Computer Backup | Mac/PC, USB cable | 15–45 min. | Very large backups, no iCloud subscription |
What is transmitted – and what is not
Transferred: Photos, videos, contacts, calendar, messages (iMessage and SMS), app data, settings, wallpapers, Wi-Fi passwords (only with encrypted backup), health data (only with encrypted backup), Apple Watch backup.
Not automatically transferred:
- App logins – Many apps require you to log in again after the transfer (WhatsApp, banking apps, authenticator apps)
- Apple Pay cards are offered when setting up the new iPhone, but must be re-verified with the bank or card issuer.
- eSIM – With supported providers (e.g., Telekom, Vodafone, o2), it is activated directly during quick start or via Settings > Mobile > Add eSIM. For unsupported providers, customer service must be contacted.
- Two-factor authentication – Authenticator apps (Google Authenticator, Microsoft Authenticator) must first be manually exported or reconfigured.
Common problems and solutions
Quick Start screen does not appear: Restart both iPhones. Ensure that Wi-Fi and Bluetooth are enabled on the older iPhone. The older iPhone must be running at least iOS 12.4.
If the transfer freezes or is extremely slow: Connect both devices to a power source. Ensure a strong Wi-Fi signal. Other Wi-Fi devices on the network can affect the speed.
Apps will remain in standby mode: After the transfer, apps will be downloaded from the App Store in the background. This can take several hours for many apps. Keep your iPhone connected to Wi-Fi and plugged into the charger.
Not enough iCloud storage? Apple provides 21 days of free temporary storage for the transfer. Go to Settings > General > Transfer or Reset iPhone and tap "Prepare for new iPhone".
After the move: What still needs to be done
Pair your Apple Watch – After setting up your new iPhone, pair your Apple Watch again using the Watch app. You will be offered the option to restore your watch's backup.
Transferring the eSIM – If your old iPhone uses an eSIM, have it transferred to your new device by your mobile provider. With some providers, this can be done directly through the settings.
Check apps – Banking apps, authenticator apps and WhatsApp often require re-verification on the new device.
Erase your old iPhone – Only reset your old iPhone once all your data has been transferred to your new iPhone and everything is working. The article "Resetting your iPhone" explains how to do this.
If you want to free up storage space after moving your device, you'll find tips in the article "Clearing the iPhone Cache". Our iPhone buying guide shows you which iPhone is best suited for which purpose. The best products for you: Our Amazon storefront offers a wide selection of accessories, including those for HomeKit. (Image: Shutterstock / Karlis Dambrans)
- Clear History on iPhone: Safari, Chrome and more
- Disable Audio Zoom on iPhone
- iPhone Battery drains quickly: Here's how to extend Battery Life under iOS 26
- Resetting your iPhone: All reset methods under iOS 26
- iCloud Costs: All storage plans, prices, and which one is worth it
- Recording an iPhone call: What works in Germany – and what doesn't
- Clear iPad Cache: More Storage and better Performance
- Clear iPhone cache: How to make your iPhone fast again
- Search iCloud.com: Activate new search function in iOS 26.4
- Apple Watch Tips: Hidden features you didn't know about
- iPhone storage full? Here's how to instantly free up more space
- Apple Account Purchase History: Review purchases, subscriptions & costs
- Apple Music: How to successfully migrate from Spotify & Co.
- AirTag 2 Factory Reset: How to Perform a Reset
- Apple Games App: Central hub for modern gaming
- Lockdown Mode: Maximum security for iPhone, iPad and Mac
- Apple Music: How to activate translated song lyrics in iOS 26
- Apple Creator Studio: Apps, subscription, and clear AI limits
- Is Apple Music taking up too much storage space? This will help immediately
- AirTag 2: Setting up Precision Finding on the Apple Watch
- How to turn texts into reminders with Apple Intelligence
- Precision Finding on the Apple Watch requires AirTag 2
- AirTag 2: Which airlines support baggage tracking
- AirTag 1 or AirTag 2: How to tell the difference
Frequently Asked Questions: Transferring data to a new iPhone
The easiest way is via the quick start function: Place both iPhones next to each other, follow the instructions, and select "Transfer from iPhone." Alternatively, the data can be transferred via an iCloud backup or a computer backup (Finder/Apple Devices app).
Depending on the amount of data and the transfer method, the process takes between 20 minutes and over an hour. Large photo libraries and numerous apps will increase the duration. Both devices should be plugged into chargers during the transfer.
Not necessarily. Apple provides 21 days of free temporary iCloud storage when you buy a new iPhone – regardless of your plan. Go to Settings > General > Transfer or Reset iPhone and tap "Prepare for New iPhone".
App data is generally transferred. However, with WhatsApp, the phone number must be re-verified after the transfer. Banking apps and authenticator apps also require a new login or verification on the new device.
Before moving your Apple Watch, unpair it using the Watch app on your old iPhone. This will automatically create a backup. After setting up your new iPhone, pair the Watch again – the backup will be offered for restoration.
With supported providers like Telekom, Vodafone, and o2, the eSIM is transferred directly during quick start or via Settings > Mobile > Add eSIM. For other providers, customer service must be contacted.
No – only after the move. First, make sure all your data has transferred to the new iPhone and everything is working. Then reset the old iPhone via Settings > General > Transfer or Reset iPhone > Erase All Content and Settings.