A concert ticket with no app, a loyalty card from the studio around the corner, a library card with a QR code: until now, passes like these only made it into the Wallet app through workarounds. In iOS 27, you simply build them yourself with "Create a Pass" — this guide shows you step by step how it works.
The Wallet app has long been more than just a place for credit and debit cards — loyalty cards, boarding passes, and event tickets have been a fixed part of the digital wallet on the iPhone for years. Until now, however, adding a pass depended on the provider: either there was an app with Wallet integration, or you had to turn to a third-party app that converted offline passes into a digital format. With iOS 27, this detour disappears, because the new "Create a Pass" feature is built directly into Wallet. Below, you'll find both methods — the quick camera scan and manual creation — as well as the most important pitfalls.
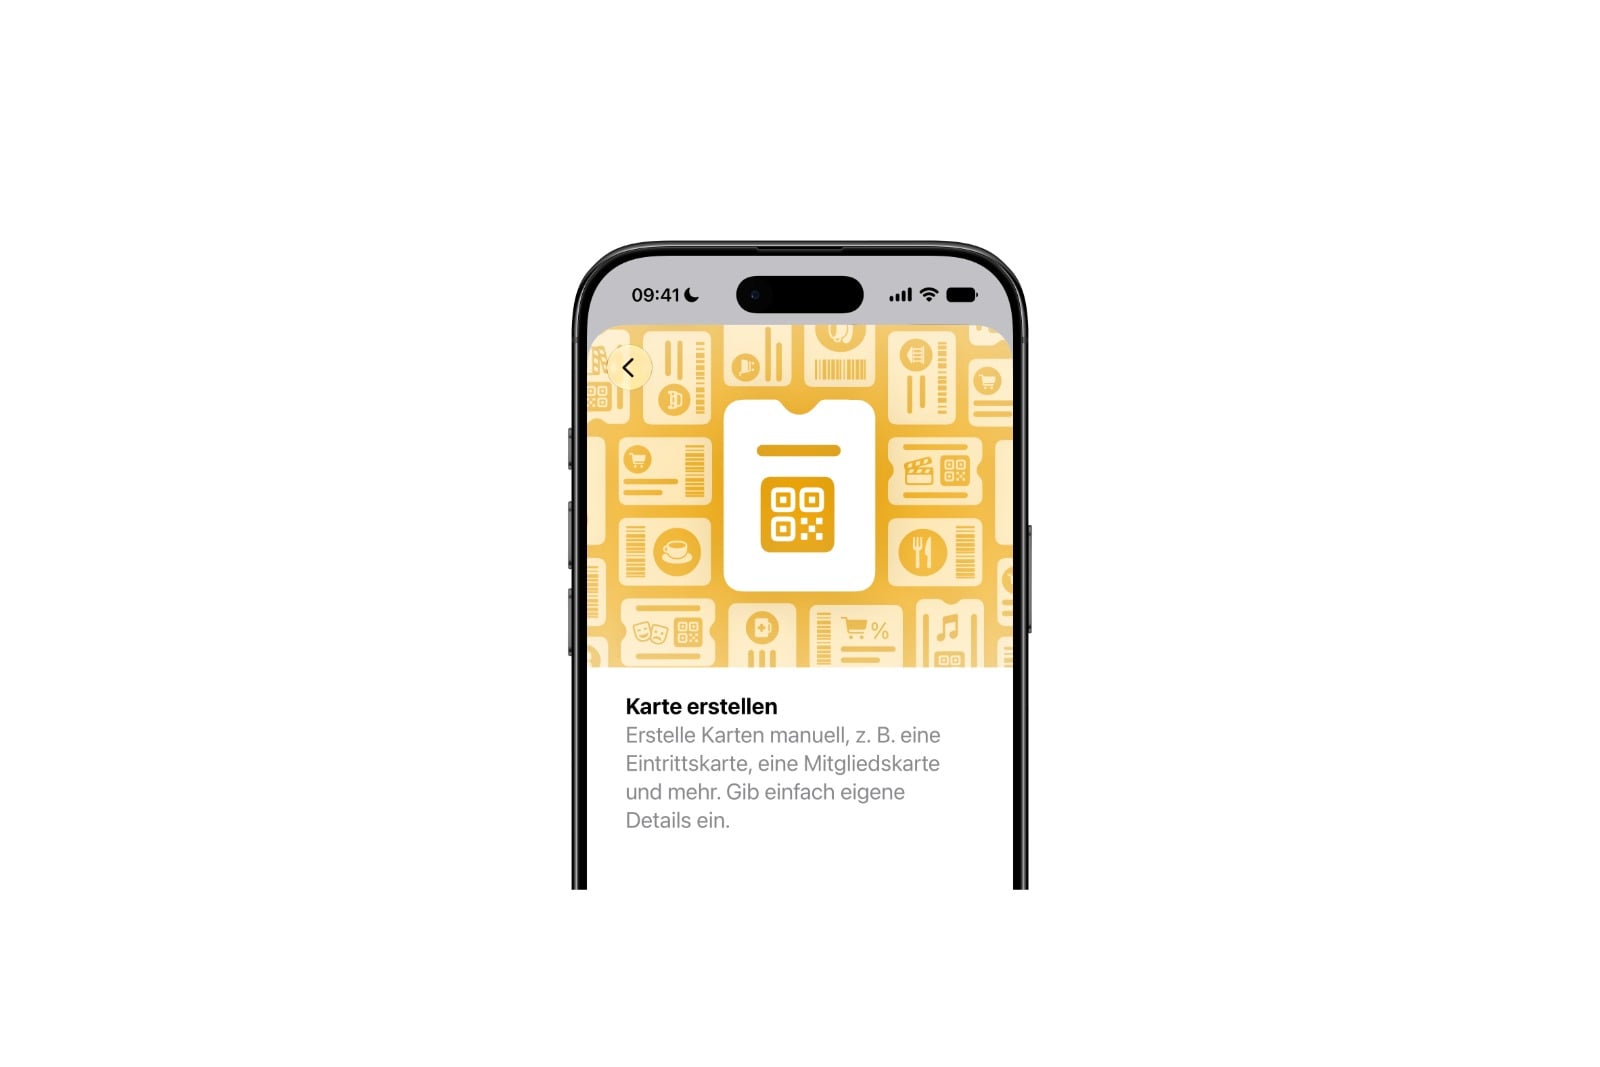
Where to Find Create a Pass
You start via the plus symbol at the top of the Wallet app. Under the option for adding new entries, you'll find "Create a Pass," described as "Tickets, membership cards, and more." Tap it, and you'll be offered two methods: automatic capture via Visual Intelligence or manual creation.
The target is all those passes that were previously left out — such as the ticket for a concert without its own app, or the loyalty card of a local provider that never built a Wallet integration via Apple's PassKit system. Instead of a static photo file, you get a real, structured pass that you can access directly from the lock screen, just like any other Wallet entry.
The Quick Way via Camera Scan
The more convenient of the two methods runs via Visual Intelligence: you scan the real pass with the iPhone camera, and the system builds the digital version directly from it. For most people, this is likely to become the standard method going forward, because it reduces the effort to a minimum.
This method, however, requires the updated Siri AI, which isn't available to everyone right away — access runs through a waitlist that is currently working through only slowly. In the EU, there's an additional fundamental hurdle: the new Siri AI won't launch on iPhone and iPad here at first, which traces back to the regulatory requirements of the Digital Markets Act. Anyone wanting to use the scan method in Europe is out of luck for now — the manual creation in the next section, on the other hand, works without restriction.
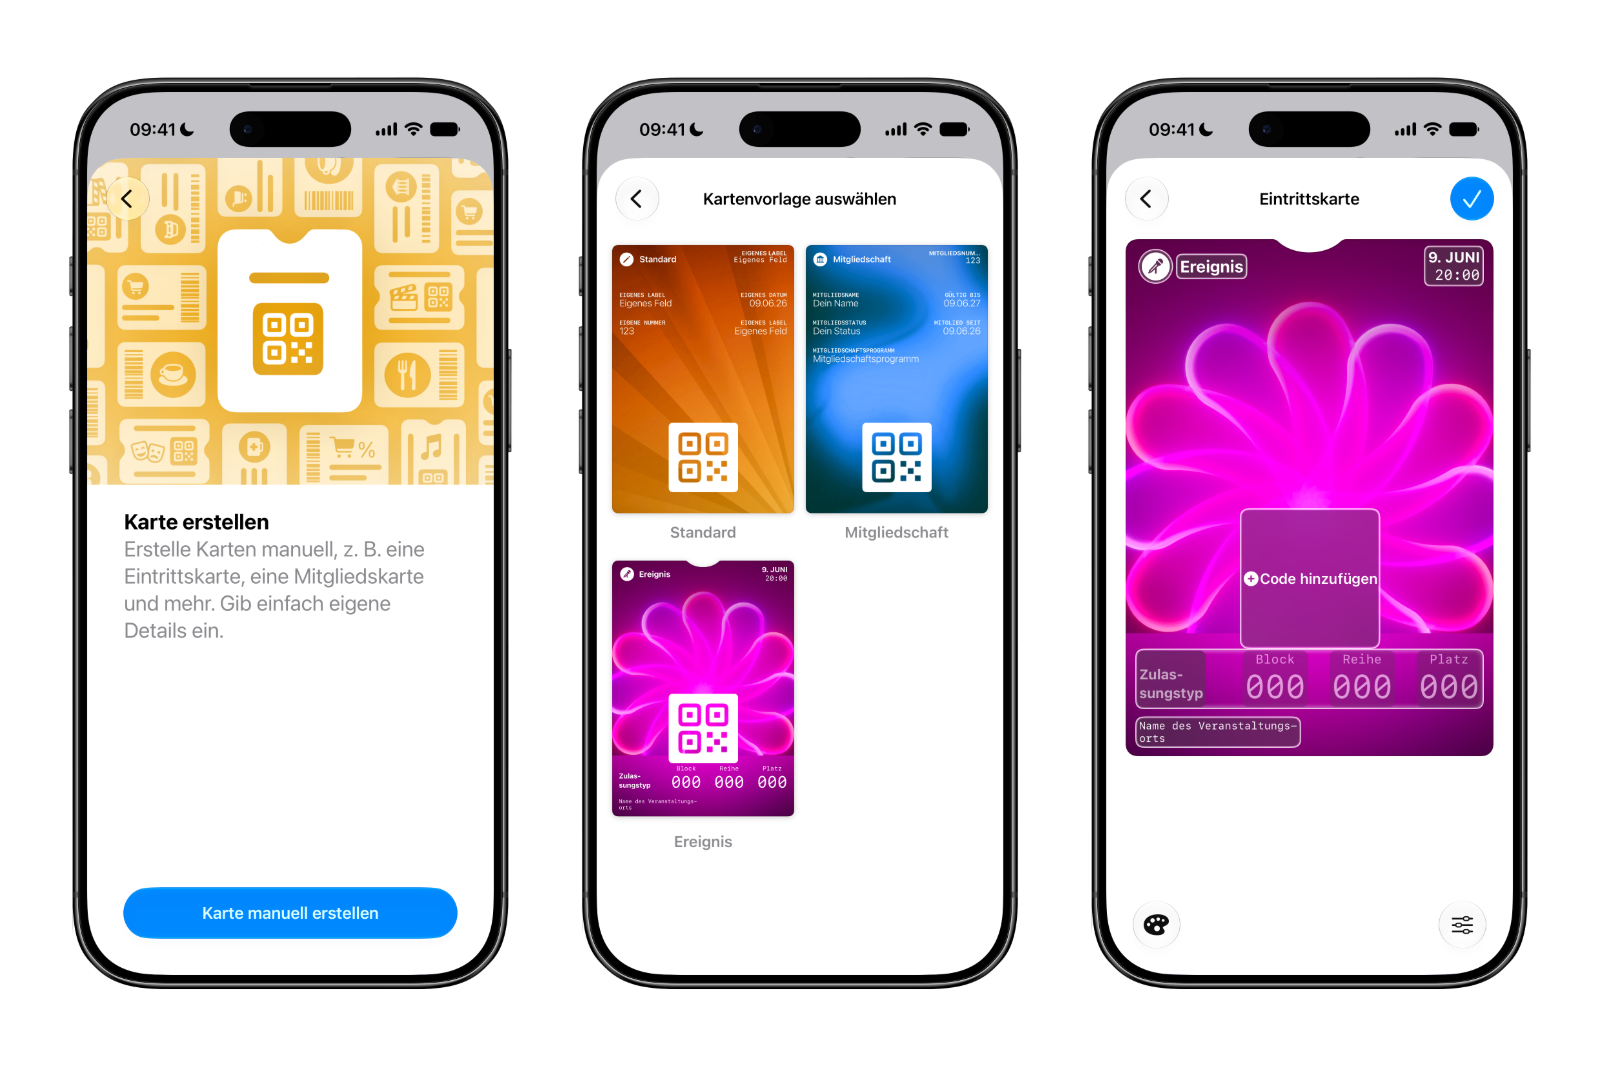
Creating a Pass Manually — Here's How
Manual creation takes a bit more hands-on effort, but it's straightforward as long as you have all the necessary details at hand. Since you're holding the real pass anyway, that's rarely a problem. Here's how to proceed:
- Open the Wallet app and tap the plus symbol at the top.
- Select "Create a Pass," then choose manual creation.
- Decide on one of the three templates (see the table below for details).
- Tap the individual fields to adjust the title and content — input aids like a date picker help where needed.
- Add the barcode or QR code via the middle field (see the section on code scanning).
- Finally, adjust the color and background via the options at the bottom right, and save the pass.
The three templates differ in layout and default color:
| Template | Intended for | Standard color |
|---|---|---|
| Membership | Access cards such as gym, club, or workplace, including fields like membership status and membership number | Blue |
| Event | Concerts, theatre and cinema visits, with details such as type of access and seat details. | Purple |
| Standard | General-purpose template with pre-prepared but unlabeled fields. | Orange |
The color scheme isn't just decoration: since Wallet sorts the passes visually in the stack, you can tell your self-created entries apart at a glance. If the preset fields don't match your pass, you can remove them via a button at the bottom right or replace them with other ready-made fields.
Scanning the Barcode Correctly
When empty, the large field in the middle is labeled "Add Code." When you tap it, the camera opens, and the first recognized barcode or QR code goes straight into the field. There's no need to line it up with a frame — the capture happens automatically.
The system is remarkably uncritical about this: it simply copies the scanned code without checking what it's for — even the barcode of a medication package could be read in without any trouble. In practice, this means you should pay attention to which scannable codes are nearby. Otherwise, the wrong one quickly ends up in the pass.
Customizing the Appearance: What Works, What Doesn't (Yet)
Via the options at the bottom right, you change the appearance of the pass. Alongside the colors, a few preset background graphics are available if you want something less plain. The selection isn't exactly generous, though: twelve background colors sounds like a lot, but in practice it's more like six color tones plus a row of grayscale options. As for the graphics, there are seven designs based on light trails, whose colors can't be changed.
There's still room for improvement here: additional colors or the option to use your own image from the Photos app would make sense. For concert outings in particular, a custom motif — such as a picture of your favorite artist on the ticket — would be an appealing touch. Until then: the design is functional, but deliberately kept narrow.
Why Apple Is Building In This Feature
Behind "Create a Pass" lies a larger shift. Apple had already introduced PassKit back in 2012 with iOS 6, but it was used consistently mainly by airlines, large retailers, and ticketing platforms. Many gyms, cafés, libraries, and smaller loyalty programs never built their own Wallet pass, because getting there requires a developer account and certificates. With the new feature, Apple decouples Wallet's growth from developer adoption and ties it to the users themselves — who now fill the gaps on their own.
Create a Pass — The Key Takeaways at a Glance
With "Create a Pass," the Wallet app in iOS 27 becomes the universal home for tickets, cards, and IDs, regardless of whether the issuer ever built its own app. The manual method is available right away and saves you from constantly carrying physical cards, even if the first creation takes a little patience. The quick scan method via Visual Intelligence is held back in Europe for now by the pending Siri AI. But anyone who doesn't shy away from the effort of manual entry has a useful tool at hand today — and once the AI variant rolls out widely, the manual work shrinks to occasional corrections.
The best products for you: Our Amazon storefront offers a wide selection of accessories, including those for HomeKit. (Image: Apfelpatient)
- iOS 27, iPadOS 27 and macOS Golden Gate: These Apple devices are compatible
- How to install the iOS 27 Developer Beta: guide, risks and troubleshooting
- Setting Up Apple Family Sharing Securely: What Parents Need to Know
- iCloud Private Relay vs. VPN: What Actually Protects You?
- How to protect Apple devices from malware
- Configuration Profiles on the iPhone: When They Help, When They Become Dangerous
- HomePod Plays Music on Its Own: How to Stop Ghost Touches
- Selling Your iPhone Safely: How to Prepare Your Device the Right Way
- Using Apple Pay Safely: How the iPhone Protects Your Payments
- Data Leak Check on iPhone: How to Find Compromised Passwords
- Spotting a Hacked iPhone: Real Warning Signs, Common False Alarms and the Right Steps
- Advanced Data Protection for iCloud: How to Use Apple's Strongest Encryption Tier
- NameDrop on iPhone and Apple Watch: How to Use It Right
- Two-Factor Authentication for the Apple Account: Setup Guide, Options and Security Levels
- Using Passkeys on Apple Devices: How Passwordless Sign-In Works
- Activate and properly use Stolen Device Protection on iPhone
- Pegasus and Commercial Spyware on iPhone: What Users Really Need to Know
- Secure email usage on the iPhone
- AI makes your iPhone more secure – what that really means for you
- Apple Security Updates: How Apple protects your Devices
- Ransomware explained: Could my iPhone be affected?
- Identity theft: What to do if your Data has been stolen?
Frequently Asked Questions: Create a Pass in iOS 27
Create a Pass is a new Wallet app feature that lets you create your own digital passes — for example, from tickets, membership cards, or library cards that don't have their own Wallet integration. You scan the source pass with the camera or enter its details manually.
In the Wallet app, tap the plus symbol at the top. Under the option for adding new entries, "Create a Pass" appears with the note "Tickets, membership cards, and more."
Yes. The manual method, where you set the template, fields, and code yourself, works independently of Siri AI. Only the automatic camera scan via Visual Intelligence requires the updated Siri AI.
The automatic scan is tied to Siri AI, and that doesn't launch on iPhone and iPad in the EU at first — the background is the requirements of the Digital Markets Act. The manual method, however, remains fully usable here.
Three: Membership (blue) for access cards such as gym or club, Event (purple) for concerts and theater visits, and Standard (orange) as an all-purpose template. The color helps tell the passes apart in the Wallet stack.
The middle field automatically reads the first recognized barcode or QR code, without you having to line it up. The system doesn't check what the code is for — so make sure no wrong code is nearby.
Partly. You can choose from around six colors plus grayscale, as well as seven preset background graphics. Your own images from the Photos app can't be used at the moment, and the graphic colors can't be changed.